![]()
![]()
CFS3 Terrain SDK
We are currently slowly working through the public beta of the CFS3 Terrain sdk. My plan is to collect together bits and pieces as we work through it slowly. Hopefully the end result will be new Theatres available for CFS3.
Where there are links below to view text of image files you can either left-click to view them in your browser or right-click and select "Save Target as.." to download them to your computer
Step 2 - Creating the Landclass file
Step 3 - Putting the bare theatre into CFS3
First step..........creating Mesh files
This seems to be relatively straightforward now we have been given some samples of the header files used when generating mesh using the ERS2TIFF and TIFF2MSH tools.
Any DEM can be used as long as the header (.ERS) file is filled with the correct parameters. These are explained in ersdata.htm
Because of the wording of various parts of the SDK I think it is possible that Theatres may need to be square. I can`t confirm this but the default theatre certainly is.
ERS2TIFF
This tool takes the ERS header file and creates a set of Tiff image files based on the parameters you pass to it on the commandline
|
ERS2TIFF parameters in order |
|
|
InFilePattern |
The source ERS files to use. This can be just a single filename like "myterrain.ers" or it can be a wildcard pattern like "*.ers". If wildcards are used then all ERS files found matching the pattern will be processed in sequence |
|
OriginLat |
The Latitude of the centre point of the theatre. For example N32.5 |
|
OriginLon |
The longitude of the centre point of the theatre. For example E15.0 |
|
ImagePixelDim |
The size of the Tiff images to create. Usually 256 |
|
ImageStride |
The ground distance covered by 1 pixel in the Tiff images. Usually 1024 |
|
MaxHeight |
The highest elevation that will be found in the source data you are using. If ERS2TIFF finds a higher elevation than this value then it will give an error. All elevations are scaled relative to this value so you want to get it reasonably correct. |
|
OutPrefix |
A short name to use to generate the multiple filenames for all the Tiff files. If you use for example "fred" then the output tiffs will be named fred_xxxxxxx_xxxxx_xxxxx_xxxx.tif with different values replacing the xxxxxx`s for each file. |
|
OutX1,OutY1 |
The minimum width and height of the theatre in metres. According to the sdk the actual size of the theatre will be calculated from the other parameters so I assume this will only do anything if your minimum width is actually larger than the limits of the supplied data |
|
cImageX,cImageY |
The number of Tiff images horizontally (X) and vertically (Y) to split the source data in to. The actual size of the theatre is presumably calculated by using the number of images, the size of the images and the distance represented by each pixel in an image. |
When run with valid source data ERS2TIFF will create a number of tiff images. The number will be cImageX x cImageY so if you have set both to 6 you will get 36 tiff images created. All these tiff files will have filenames starting with the text you used for OutputPrefix. These tiff files are next passed to TIFF2MSH to create the final MSH files
TIFF2MSH
This tool converts Tiff image data to the actual MSH files used by CFS3 to define the terrain mesh.
|
TIFF2MSH parameters in order |
|
|
Prefix |
The Tiff files to use. This should be the same text as you used for OutputPrefix when creating the Tiff files with ERS2TIFF |
|
ArchiveDimInPatch |
Read the SDK and see if you can decipher what this does. I just use 16 |
|
PatchDimInStride |
Read the SDK and see if you can decipher what this does. I just use 16 |
|
MinStride |
The highest resolution to use. Resolutions are power-of-2 values and the smaller the number the higher the resolution. The highest used in the default theatre is 128. This actually means 128 m resolution. |
|
MaxStride |
The lowest resolution to use. As with MinStride. In the default this is 32768 or roughly 32 km. CFS3 displays the lower resolutions for areas further away to help performance. |
|
MaxHeight |
The highest elevation that will be found in the tiff data you are using. Same as for ERS2TIFF. |
A typical commandline would be TIFF2MSH fred 16 16 1024 32768 2120. This would take the tiff files prefixed "fred" and create mesh files for the 1024, 2048, 4096, 8192, 16384 and 32768 resolutions using the prefix "fred" and a maximum expected elevation of 2120m
Once the MSH files have been created you can safely delete all the Tiff files. You should then put all the MSH files into a zip. Despite what the SDK says you CAN use compression when creating this zip. All the default Mesh zips are created using compression (and the uncompressed size of a MSH set is huge!)
Copy this zip to the CFS3 Terrains folder.
A mesh set requires a MeshDescriptor file describing its contents. The easiest way to do this is to extract cfs3europemeshlibrary.xml from the terrdata zip in the terrains folder, rename it for your new theatre and then edit the contents. You need to change the "Prefix" entry to match the prefix you have used when creating the MSH files. If you haven`t done the full range of resolution from 128 then you will need to remove the whole LOD entries for resolutions you have not included. For instance if you have used 1024 to 32768 then remove the 128, 256 and 512 LOD entries.
Second step.......Creating Landclass
Landclass (LCF) files are required for theatres to tell CFS3 what type of terrain texture to use at a particular location.
There are 15 landclass types defined in CFS3. You can add your own or create a whole new set for your theatre but as each landclass type requires a full set of multiple seasonal mosaics it would be easiest to stick with the default ones for the moment. If you want to mainly use the default landclasses but add an additional one or two then you should make a copy of Landclasses.xml (found in terrdata.zip in the Terrains folder) rename it to something else and then open and edit it to add additional landclasses using free numbers.
|
Landclass numbers found in the default landclasses.xml file |
|
|
1 |
Ice/snow |
|
6 |
Grass |
|
8 |
Crop and Town |
|
10 |
Grass, Crop and Scrub |
|
15 |
Crops |
|
17 |
Marsh |
|
24 |
Forest |
|
25 |
Forest and Fields |
|
26 |
Coniferous Forest |
|
27 |
Mixed Forest |
|
31 |
Large City |
|
34 |
Medium City |
|
47 |
Small City |
|
51 |
Dry wooded scrub |
|
56 |
Rock |
Landclass files are created using the TIFF2LCF tool. The Tiff image used is an image of the theatre with each pixel representing a certain area and the colour of that pixel is used to define the landclass to use at that location in the Theatre.
In order to be able to translate a colour to a specific landclass value the tool requires a translation table. This takes the form of a text file where each line contains 4 numbers seperated by commas. The first number is the landclass value. The other 3 are the RGB values that make up the colour.
You can make up your own translation file or you can use the one I have created for my own use. My file is c2v.txt
Using my selection of landclass colours and applying them to the default theatre landclass file we see :-
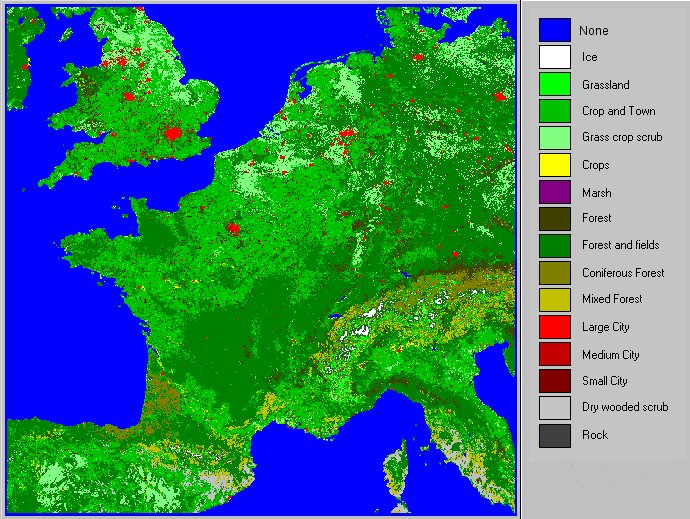
I feel that these colours give a fairly good representation. You can of course use any colours you like.
In order to create an LCF file for your theatre you will need to create an image of your theatre similar to the map section above and colour in the various parts with the landclasses you wish to appear there.
There is a technical problem as TIFF2LCF is very fussy about the type of Tiff file you use. It must be a 32 bit Tiff containing ONLY the colours you have defined in your translation file. A further complication is that the only paint program I have found that will create Tiff images that work with this tool is PhotoShop. Tiff files created by PaintShopPro are rejected by the tool. There may be other paint programs that can create the correct sort of Tiff but the only one I can definitely confirm is PhotoShop.
|
TIFF2LCF parameters in order |
|
|
InTIFF |
The Tiff image file to use. Must be 32 bit |
|
Color2Vulcan |
The text file containing the translation table linking specific RGB values to a landclass number. See c2v.txt |
|
TheatreDim |
The width of the theatre in metres |
|
Stride |
The width in metres of each single landclass tile. SDK says this must be a power of 2. |
|
LandclassesXML |
The name (without path) of the XML file to be used at runtime to find the details of each landclass type. Unless you are going to create your own just use Landclasses.xml |
|
OutLCF |
The name of the LCF file to create. |
eg - TIFF2LCF "myterrain.tif" "c2v.txt" 786650 1024 Landclasses.xml "myterrain.lcf"
This will create the Landclass file MyTerrain.lcf from the supplied parameters.
Note that the TheatreDim divided by the Stride must exactly equal the width of your Tiff image! You may have to resize your tiff after doing the relevant calculations.
TIFF2LCF will stop with an error if it calculates that the Tiff image size is not correct for the TheatreDim and Stride settings. It will also stop with an error if it finds a colour in the image that doesn`t appear in your translation table.
Step 3......Getting the Theatre into CFS3
The next step is to get your theatre into CFS3 so you can check that it is working properly.
To get a new theatre recognised you need 2 things. A "Theatre Descriptor" and at least one Airfield in your new theatre.
TheatreDescriptor file
Every theatre needs a descriptor file that tells CFS3 what sets of files to use to display the theatre. At this early stage we will have to utilise the default files for some of the entries because we haven`t got as far as creating custom ones yet.
The theatre descriptor is an XML file that follows a particular format. The easiest way to create one is to extract CFS3Europe.xml from the Terrdata zip in the Terrains folder, rename it for your new theatre and then edit the contents.
The entries to edit for the moment are listed below. All others can be left as they are for now until we reach the stage of creating the rest of the theatre components.
|
OriginLat,OriginLon |
Set these to the location of the centre of the theatre |
|
LandClassField |
Set this to the name of the LCF landclass file you created for the theatre at step 2 |
|
MeshLibrary |
Set this to the name of the Mesh Descriptor XML file you created for the MSH files at step 1 |
Put this file into the Terrains folder along with the MeshDescriptor file from step 1.
Adding an Airbase
The theatre is actually now in CFS3. Problem is that you have no way of going to it for a look-see. To get there we need an airbase.
Before doing anything else make backup copies (outside CFS3) of the following files so you can restore things if it all goes wrong...
QCLocations.xml
Global_Layer\Global_Layer.csv
Global_Layer\GSL.lib
Read the sdk "Global Layer" documentation to get the general idea of adding a facility to CFS3 and then go to the sdk GlobalLayer folder.
Open up global_layer.csv and add a new airbase. Run the batch file to compile a new gsl.lib. Copy gsl.lib and global_layer.csv to your CFS3 Global_Layer folder so they overwrite the existing ones. Then edit QCLocations.xml to add your new airbase BUT use the name of your new theatre in place of CFS3Europe in the Terrain entry
Adding Airbase Example
At this stage there is little point creating your new airbase as belonging to a new country or city. Just use one of the existing entries and change the lat/lon, ID and full-name. For our example here we will just add an extra airbase to Cherbourg.
Go to the SDK GlobalLayer folder
Open up global_layer.csv in notepad
Find the line containing Cherbourg and copy it. Paste it back in at the end of the file.
Go to this last line.
Change the Lat and Lon entries to a location within your new theatre
Change the first occurence of "Cherbourg" to something else. we shall use "Test Airbase".
Change the "cheg32" ID entry to a new unique ID. We shall use "test01"
Save the file and then run the Batch file to compile gsl.lib
Copy gsl.lib and global_layer.csv over to the CFS3 Global_Layer folder
Now open up the QClocations.xml file in the main CFS3 folder. It is easier to edit it if you use notepad. Find the line that says <City Name="Cherbourg">. Immediately below this you will see another line containing the airbase details. Copy it and paste it in so that you now have 2 identical lines. Edit one of them to match the ID, Lat and Lon of your new airbase. Change the Terrain="CFS3Europe" to use the name of your new theatre instead. This is the name of the Theatre Descriptor file without the .XML on the end.
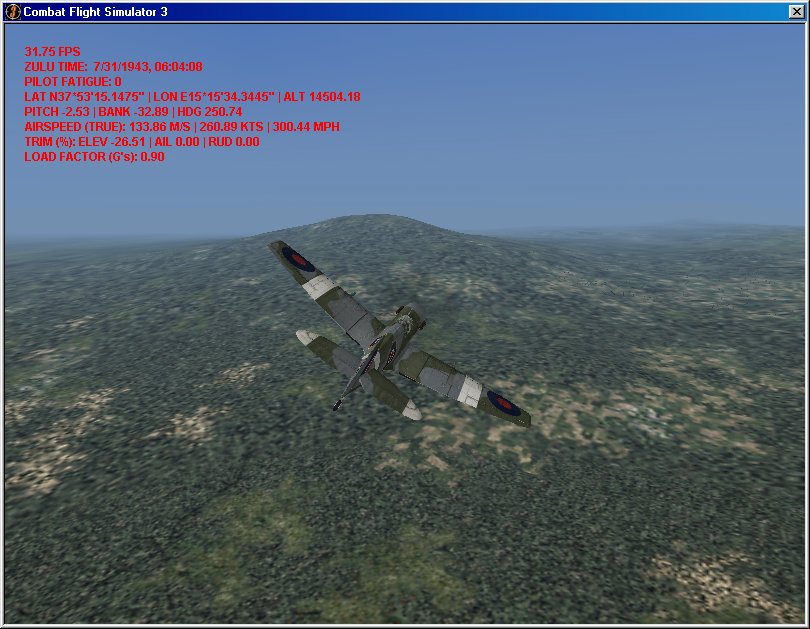
Visiting the Theatre
Using the Cherbourg example above you should now be able to visit your theatre. Run CFS3 as normal. In your quick combat option select location then France then Cherbourg. You should see 2 possible airbases in the drop-down list. "Cherbourg" is the original airbase in france. "Test Airbase" is your new one situated in your new theatre. Select your new one and then Fly...
One thing you will notice is that there is no water in your new theatre. we haven`t reached the "Adding Water" stage yet.
You may also notice roads running randomly around the new terrain. This is because we are still using the default VectorMosaic. It seems a new theatre won`t work without some sort of VectorMosaic so we have to use the default one for now.